WebSockets Demo
This is a demo app to accompany the WebSockets and Methods for Real-Time Data Streaming talk at the SE Michigan JavaScript users group (see slides below).

WebSockets Presentation Slides

Background
This app consists of a server and a client. The server happens to be written in NodeJS, since this was originally created as a demo for a JavaScript users group after all; but it could have easily been written in Ruby, Python, or some other language and the lessons would remain the same.
The client is a single HTML webpage, which can be opened directly in the browser. The page uses the HTML5 WebSocket spec to connect and stream data to and from the server in real-time.
Requirements
This app is intended for demonstration purposes, and thus the front-end uses no 3rd-party WebSockets library, such as Socket.IO; it's just plain, good old fashioned JavaScript. As a result, this should not be considered cross-browser compatible. It's been built and tested using Chrome on Mac OSX.
To run the server, you will need to have NodeJS and NPM installed.
Getting Started
Grab the repo from Github:
git clone git://github.com/JangoSteve/websockets-demoDemo host
This demo can be run by yourself, or for many people, e.g. over a local wifi network. For running it yourself or hosting the demo over a network, you'll need to run the server.
To do this, cd into the project's root directory and install:
cd websockets-demo
npm install
Once everything is installed, run the server:
npm startDemo client
Once the server is running, you can connect (and so can anyone else over the network).
Just open the client page (assuming Chrome is your default browser; if not, try browsing to the page in your Finder, right click, and open with Chrome (then again, it may run in Firefox or some other browser too, who knows)):
open index.htmlTo see the WebSockets in action, try opening the client page a bunch of times in different tabs:
open index.html
open index.html
open index.html
open index.html
open index.html
open index.html
open index.html
open index.html
Optionally, you may also open the client page over the
network, e.g. locally or over wifi, if you have the server
running. Visit http://localhost:8080, or look
up your local network address (e.g. 192.168.1.1) using ifconfig
and visit your address on port 8080.
Client Modules
Everyone who opens the page will be connected to the same WebSocket server. The WebSocket server simply provides the plumbing, via WebSockets, to enable clients to pass and receive messages to and from other connected clients.
With WebSockets, a message is usually just a string. This app, however, uses JSON, by simply serializing and deserializing the JSON object as it's passed between the server and client.
The only
required data in a messaged created by a client module (for the purposes
of this app), is a type attribute, which names the type of message
being sent.
For example, the connected event looks like this:
{
  type: 'connection',
  id: ws.id // letting the client know their id
}
Besides the type attribute, the only other attribute which has any
special meaning to the server is the optional target attribute. If
included, the server will only send the event to the client with the id
specified by the target attribute. If the target attribute is not present, the
event will be sent to all connected clients (including the client that
sent it).
For example, the targeted click event looks like this:
{
  type: 'click',
  target: 2 // id of target client to send event
}
The server forwards these events back to the connected clients (or just
the target client), appending a sender attribute to tell the client
who sent the event.
{
  type: 'click',
  target: 2,
  sender: 1
}
Event log
A common client-side interaction for this demo is to output to the Event Log, which is the gray area at the top of the page that informs the client of captured events from the WebSockets server.
A module can output to the Event Log similar to how you'd output to the
browser's JavaScript debugging console, except via the global msg object:
msg.log('Hello there');
Core modules
There are three client modules included by default in this app that are required for the app to function (i.e. the core modules):
| connected.js
(view source) |
receives the connected event when the client connects to the WebSocket server. |
|---|---|
| connection.js
(view source) |
receives an event that is sent by the server each time another client connects. |
| closed.js
(view source) |
sends an event to the server when a client disconnects, and receives the event for the remaining clients. |

Included modules
In addition to the required client modules above, two other modules are included to demonstration what an add-on module would look like and what they can do:
| click.js
(view source) |
allows clients to click the squares representing other
clients to send them a click type event.
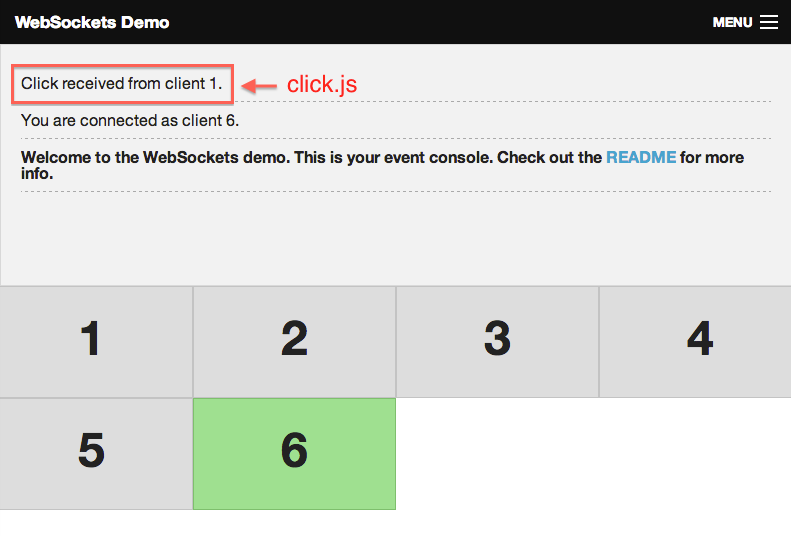
|
|---|---|
| follow.js
(view source) |
allows clients to click their own square and then move
their mouse around the screen, causing their square to follow their
cursor in real-time on all clients' screens.
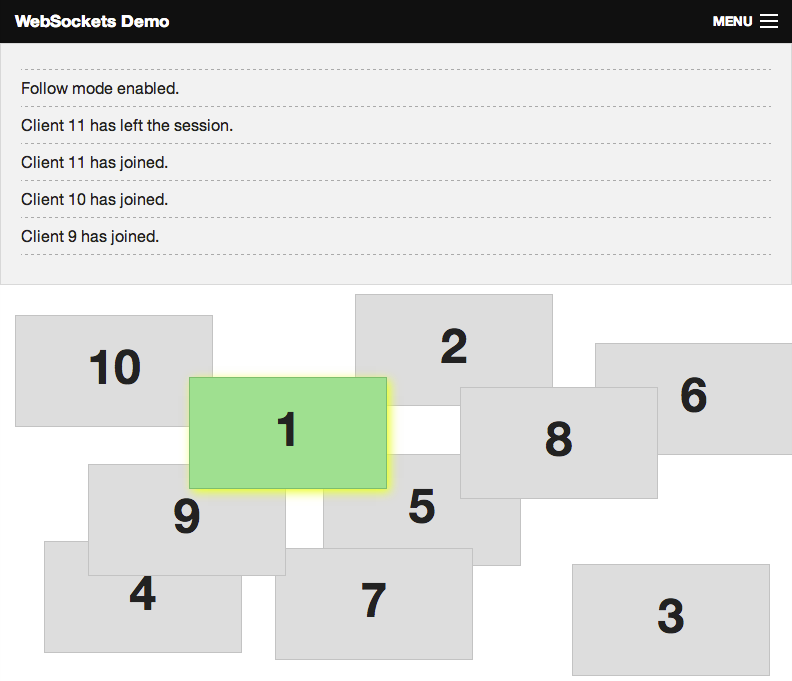
|
Create your own!
Anyone can create a new module and
include it on their own client page, allowing them to send events of a new
type to other users.
The author could then distribute their client module to other users, and anyone who also include the module in their client page would be able to receive the events (technically all clients would receive the events already; they need to include the module in their own page for their page to do anything as a result of receiving the event).
To create your own module, just add a file to the client_modules
folder. For example, let's say you were to have created the click
module. You would first create a new file in client_modules called
click.js.
In that file, we need to do three things:
1) Register the module with the client:
msg.install("click.js", "#");The first argument above is the name of the module. The second argument is an optional URL to link to the homepage for your module.
2) Send our event payload to the server. In this case, we only want to send it when the client clicks a square that is not their own.
$(document).delegate('.client[data-id]', 'click', function (e) {
  var target = $(this).data('id'),
      message = JSON.stringify({type: 'click', target: target});
  if (target !== connection.id) { // don't send clicks to ourselves
    connection.send(message);
    msg.log('Click sent to client ' + target + '.');
  }
});
3) And finally, we need to define how the client reacts when our payload is received from the server.
We do this by defining a function on the
global msg object, whose name matches the type attribute from our
payload (by convention, this should match the name of your module).
msg.click = function(data) {
  msg.log('Click received from client ' + data.sender + '.');
}
That's it, a working module!
If you have an idea for a module, create a Pull Request and we'll pull it in.